Getting started...
There are several ways to set up a Zyndex. You can actually do almost all of these steps easily with a text program, here we explain three ways to set up a Zyndex:
...with a text program
Step 1 - Create a folder
Create a new folder somewhere where you can remember it (for example on the desktop) and name it, for example: "Zyndex" and then open this folder.
Step 2 - Create Index JSON File
In this folder, create a new file called index.json. It is very important that the file actually has this name, as this is considered the endpoint for the Zyndex. The directory structure should now look like this:
Step 3 - Add the basic layout to the file
Now open the new index.json file with Notepad (Windows), TextEdit (macOS) or your standard text editor.
Copy the following into index.json:
Step 4 - Correct the values
Enter your information to correct the values in the file. Change the following values.
name: Enter what you want your Zyndex to be called.
url: Enter the address through which your Zyndex should later be accessible.
owner: Enter here what the group or person behind the Zyndex is called.
As an example, let's now take the name "Muster", the url "https://example.com/zyndex/index.json" and the owner "Mustermann".
Step 5 - Save & that's it!
Now save the file and keep the name index.json and path of your new folder. So you have already created a local Zyndex. This doesn't yet have any instances, resources, etc. and can't be accessed from the internet yet, but in the base you have an empty, fresh, new and above all: your own Zyndex!
Next steps
...with JetBrains IDEA
Step 1 - Create new empty project
Open IntelliJ IDEA Community Edition and create a new empty project. Enter the name and location you want to use.
Leave create git repository unchecked.
Step 2 - Create the index.json file
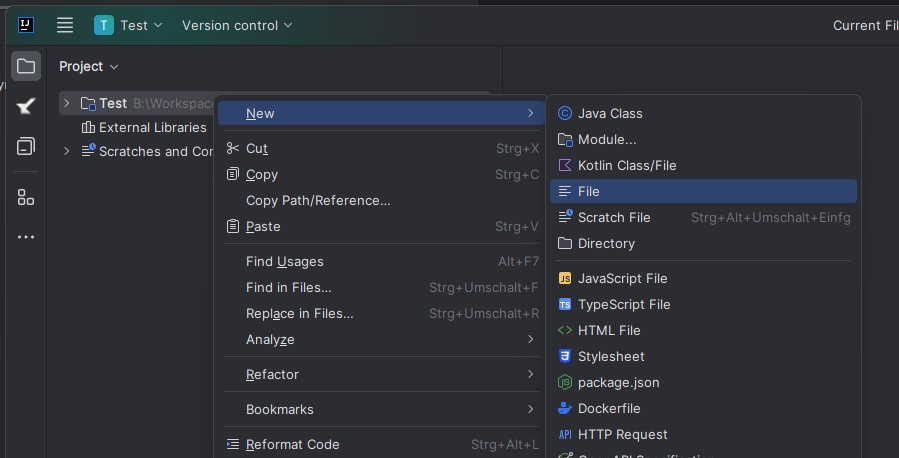
Right-click on your project in your project explorer. Navigate to "New" and then select "File". Name the file index.json. It is very important that the file has the same name as this file will be the endpoint for your Zyndex. 
Step 3 - Create basic layout
Copy the following text into your index.json:
Step 4 - Correct all values
Enter your information to correct the values in the file. Change the following values.
name: Enter what you want your Zyndex to be called.
url: Enter the address through which your Zyndex should later be accessible.
owner: Enter here what the group or person behind the Zyndex is called.
As an example, let's now take the name "Muster", the url "https://example.com/zyndex/index.json" and the owner "Mustermann".
That's it!
Complete! You now have your own Zyndex.
So far you can't do anything with it because there's no content yet and it's not yet accessible from the internet.
But you have set up a basic Zyndex - Congratulations!
Next steps
...with Visual Studio Code
Step 1 - Create a new folder
Create a new folder somewhere you can remember it (for example on the desktop) and name it "Zyndex", for example.
Step 2 - Open Visual Studio Code
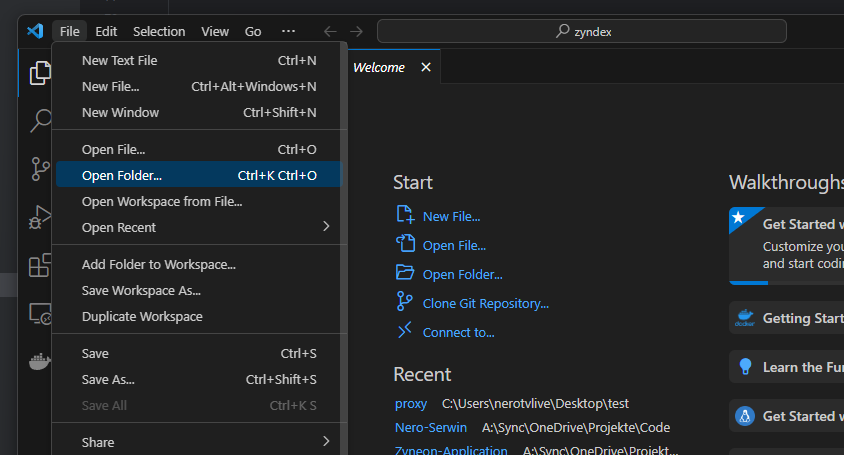
Open VS Code and click "File" in the toolbar and then click "Open folder". From there, select the folder you just created. 
Step 3 - Create the index.json
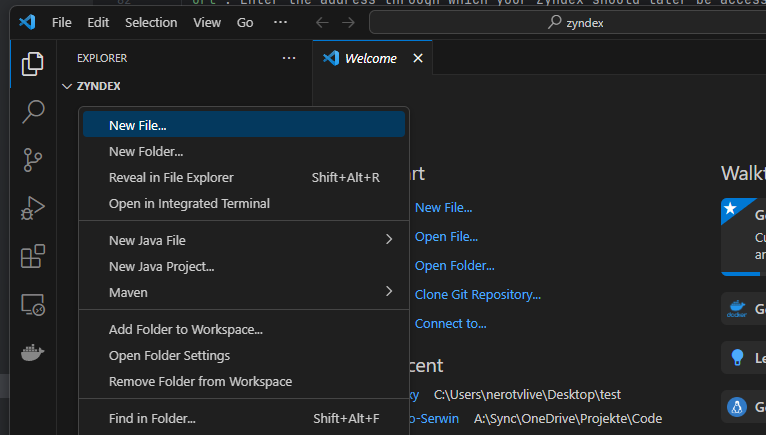
Right-click in the empty field under your folder name and click "New File...". Name the file index.json, it is very important that this file is named the same as this is considered the endpoint for your Zyndex. 
Step 4 - Create basic layout
Copy the following text into your index.json:
Step 5 - Correct all values
Enter your information to correct the values in the file. Change the following values.
name: Enter what you want your Zyndex to be called.
url: Enter the address through which your Zyndex should later be accessible.
owner: Enter here what the group or person behind the Zyndex is called.
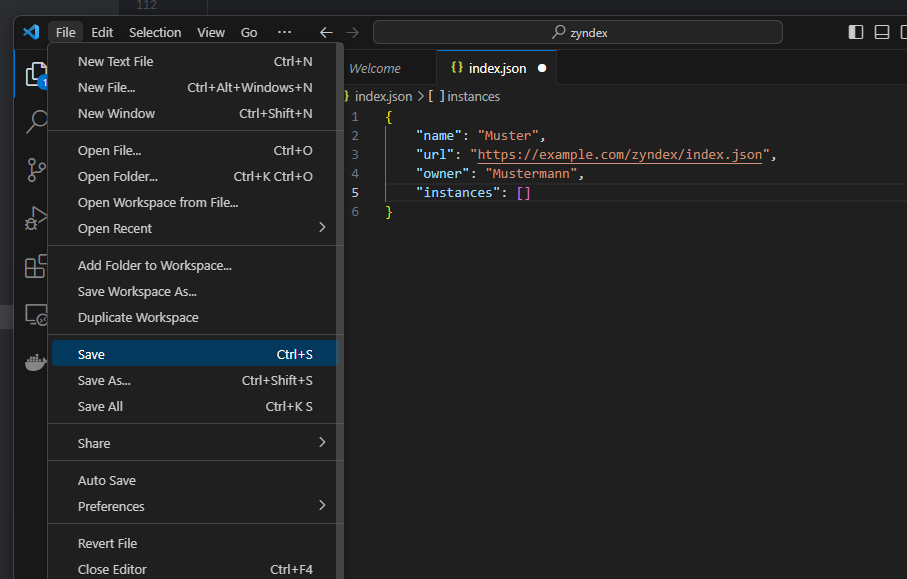
As an example, let's now take the name "Muster", the url "https://example.com/zyndex/index.json" and the owner "Mustermann".
Step 6 - Save & That's it!
In VS Code, while you have the index.json open, click "File" in the toolbar and then click "Save" or save the document using the shortcut. 
Complete! You now have your own Zyndex.
So far you can't do anything with it because there's no content yet and it's not yet accessible from the internet.
But you have set up a basic Zyndex - Congratulations!